Connect an Android Device with USB
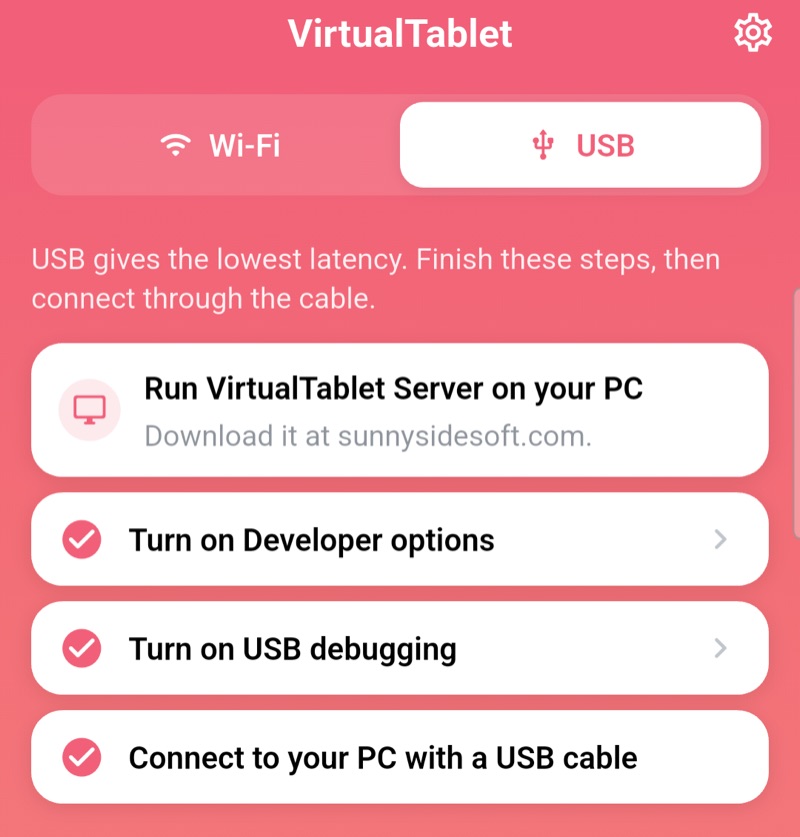
Android connects through ADB, so USB debugging has to be turned on once. The VirtualTablet app walks you through it with a live checklist that turns green as each step is done.
Step 1: Install the USB Driver (Windows only)
Windows needs your manufacturer’s USB driver to recognize the device.
- Download the official driver for your device
- Install it, then restart your PC
On a Mac, no driver installation is needed.
💡
You do not need to install ADB or Android platform-tools. VirtualTablet Server already includes everything it
needs to talk to an Android device.
Step 2: Turn On Developer Options
- Open Settings on your Android device
- Navigate to About phone (on Samsung: About phone → Software information)
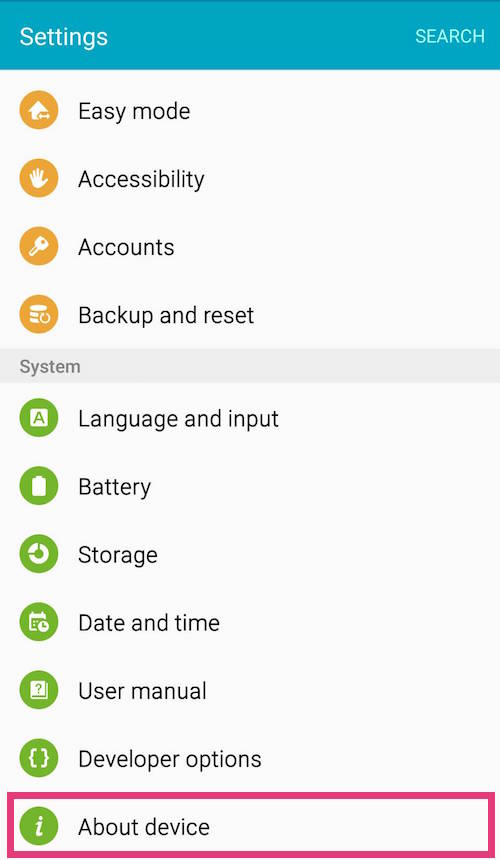
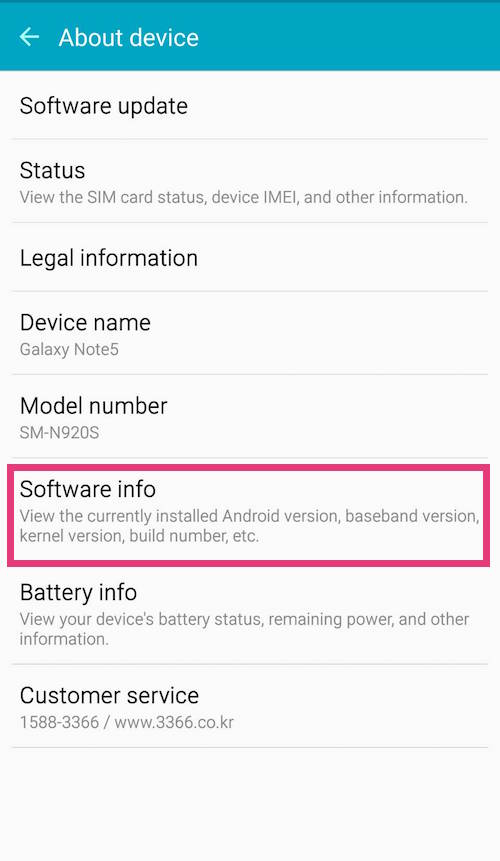
- Tap “Build Number” 7 times until you see the “Developer mode enabled” message
📱
The build number sits in a different place on each brand - on Xiaomi it is OS version, on OPPO/OnePlus/realme it
is under Version, on vivo it is Software version. The VirtualTablet app detects your brand and shows the
right path, so just follow the app.
Step 3: Turn On USB Debugging
- Go back to Settings
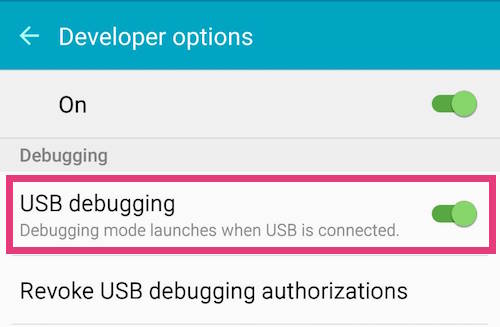
- Open Developer options (usually near the bottom of Settings)
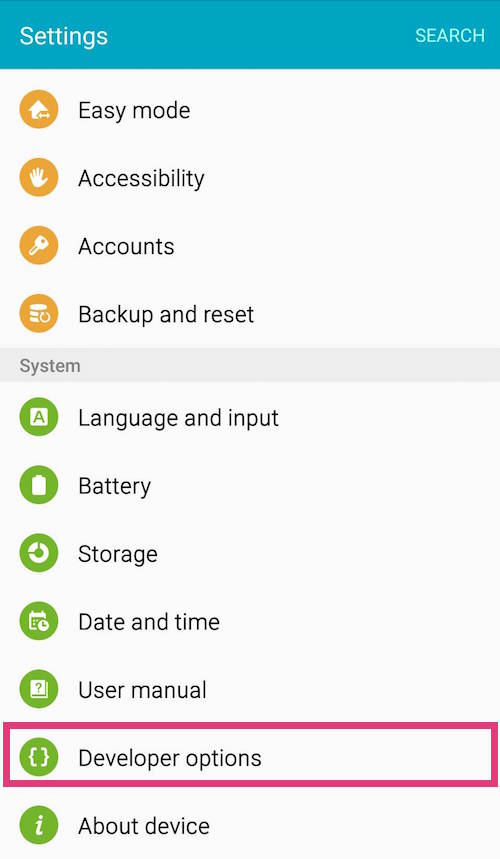
- Scroll to the Debugging section
- Turn USB debugging ON
👆
In the VirtualTablet app, open the USB tab and tap any unfinished step - it opens the matching Android settings
screen directly, and the checklist updates as soon as you come back.
Step 4: Connect and Allow Debugging
- Connect your Android device to the PC with a USB cable
- When Android asks “Allow USB debugging?”, tap Allow
- Check “Always allow from this computer” so you are not asked again
Step 5: Select the Device and Connect
- Open VirtualTablet Server on your PC, go to the Connect tab and switch to USB
- In the Android device section, pick your device from the dropdown
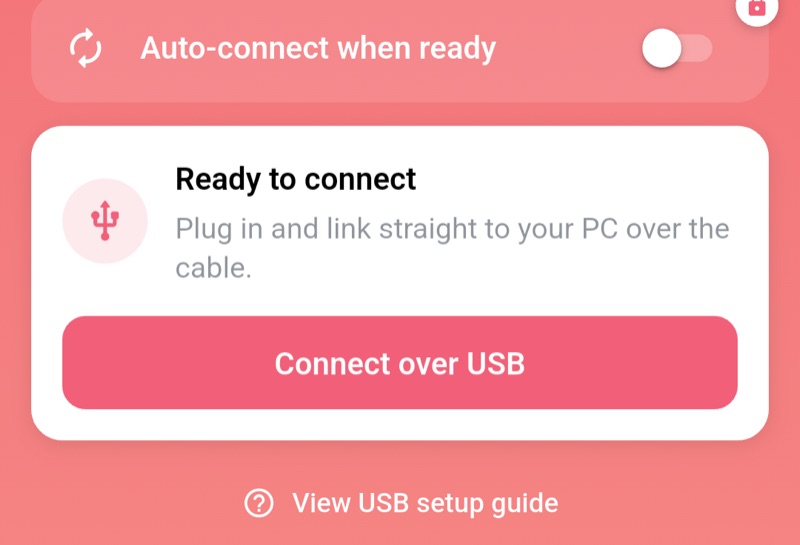
- In the app, tap Connect over USB
⭐
Pro users can turn on Auto-connect when ready in the app’s USB tab, and the connection starts by itself once
every step is green.
Troubleshooting
The device is not in the server’s device list:
- Confirm USB debugging is ON in Developer options
- Press Refresh in the Android device section of the Connect tab
- Reinstall the manufacturer USB driver (Windows)
The “Allow USB debugging?” prompt never appears:
- Open Developer options
- Tap Revoke USB debugging authorizations
- Reconnect the cable and tap Allow
Nothing happens at all:
- Use a data cable - many spare cables are charge-only
- Plug directly into the PC and avoid USB hubs
- Try a different USB port, then a different cable
- Restart both the PC and the device